Looking to add a touch of class to your next project? Then you need glass setting tape! This versatile product can be used for a variety of applications, from reinforcing glass shelves to creating unique stained glass effects. Keep reading to learn how to use glass setting tape like a pro.
What is glass setting tape?
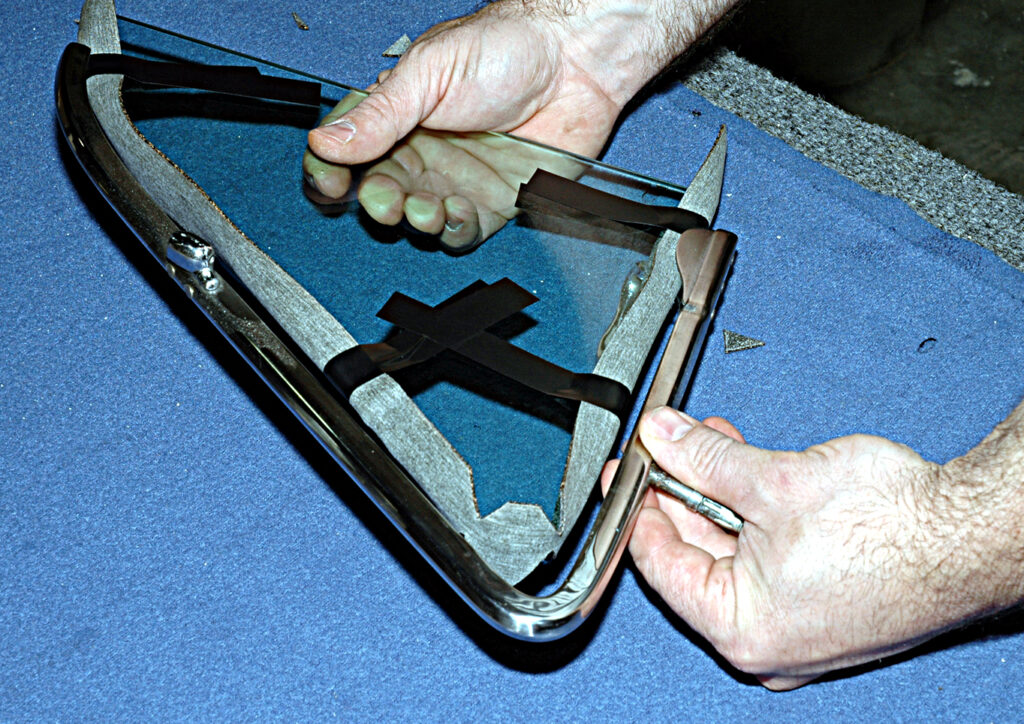
Glass setting tape, also known as lead came tape, is a specialized tape used in the construction of leaded glass windows. The tape is applied over the lead came channels before the glass is inserted. Once the glass is in place, the tape helps to secure it and prevent it from shifting.
How does glass setting tape work?
Glass setting tape is a clear, pressure-sensitive tape that is used to hold glass in place while the Mortex Kool Deck or other topping is being applied. The tape has a non-sticky side that goes up against the glass and a sticky side that bonds to the deck surface. Once the decking material is in place, the glass setting tape prevents it from sliding or shifting.
How to use glass setting tape for various projects?
Most people are familiar with glass setting tape as a product that is used to secure glass panes in window frames. However, this type of tape can also be used for a variety of other projects, including:
-Hanging pictures
-Securing mirrors
-Attaching decorative trim
Glass setting tape is available in a variety of widths and colors to suit your particular needs. When selecting a tape, be sure to choose one that is durable and suitable for the temperatures you will encounter during your project.
What are the benefits of using glass setting tape?
Glass setting tapes are an easy way to improve the energy efficiency of your home. By sealing the gaps around your windows and doors, you can keep heat in during the winter and out during the summer, saving money on your energy bills.
How to choose the right glass setting tape for your project?
Different tapes are available for different purposes, so it’s important to choose the right one for your project. The three main types of glass setting tape are:
- Butyl tape: This is a long-lasting, weather-resistant tape that’s ideal for outdoor projects.
- Polyurethane tape: This tape is also weather-resistant, but it has a lower tack level than butyl tape, making it better suited for indoor projects.
- PVC tape: This is the cheapest option and it’s best suited for short-term projects.
How to store and care for your glass setting tape?
Most people who love glassware also have a few old, chipped, or cracked pieces that they can’t bear to part with. Whether it’s a sentimental piece from a grandparent or a funky vase you picked up at a garage sale, there are ways to restore these treasures so they can be used and displayed again. One option is to use glass setting tape.
Glass setting tape is a clear, self-adhesive film that bonds glass together. It’s great for repairing cracks, chips, and breaks in glassware. It’s also great for making stained glass windows and other craft projects.
If you’re using glass setting tape to repair something that will be used for food or drink, it’s important to use food-safe tape. Make sure the label says the tape is FDA approved for indirect food contact. You can find this type of tape at most hardware stores or online.
To use glass setting tape, start by clean the surface of the glass with rubbing alcohol. This will help the tape adhere better. Then measure and cut a piece of tape to fit over the broken area. Peel off the backing and press the tape into place. Smooth out any bubbles with your fingers.
Let the taped area dry for 24 hours before using the item or putting it back on display. When you’re ready to remove the tape, start at one corner and peel it off slowly. Glass setting tape can be reused several times, so don’t throw it away after just one use! Store it in a cool, dry place until you need it again.
Troubleshooting tips for using glass setting tape
If you are having trouble getting your glass setting tape to stick, here are a few tips that may help.
-Make sure the surface you are attaching the tape to is clean and free of dirt, dust, or oil.
-If the surface is not smooth, roughen it up with sandpaper before applying the tape.
-For best results, apply the tape when the temperature is above 60 degrees Fahrenheit.
-Make sure you apply pressure to the tape as you lay it down, especially around the edges.
Glass setting tape FAQs
Q: What is glass setting tape?
A: Glass setting tape is a high-strength, pressure sensitive adhesive tape used to bond glass in a variety of applications, including window and door installation, skylights, and solar panels.
Q: How does it work?
A: The tape works by creating a strong bond between the glass and the surface to which it is applied. This bond is achieved through a combination of the adhesive properties of the tape and the pressure exerted by the tape on the surfaces to which it is applied.
Q: What are the benefits of using glass setting tape?
A: Glass setting tape provides a number of benefits over traditional methods of bonding glass, including reduced installation time, improved aesthetics, and increased strength and durability of the bond.
Q: How do I use glass setting tape?
A: Glass setting tape is easy to use and requires only a few simple steps. First, clean the surface to which you will be applying the tape with an alcohol-based cleaner or soap and water. Next, remove the release liner from the back of the tape and apply it to the surface. Finally, apply pressure to the adhesive side of the tape to ensure good adhesion.